
Every Last Piece Heart Cushion
- Katie Done
- Feb 27, 2019
- 4 min read
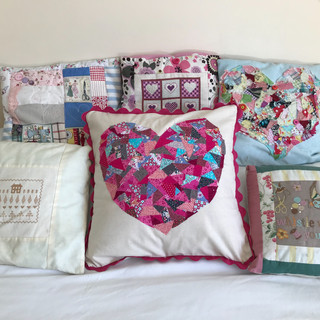
This heart cushion is one of my favourite scrap busting projects. With Mother's Day around the corner, I thought it would be a great one to share with you. I love it for several reasons. It requires no skill or planning and it uses up all the tiny bits of scraps that can't be used for much else.
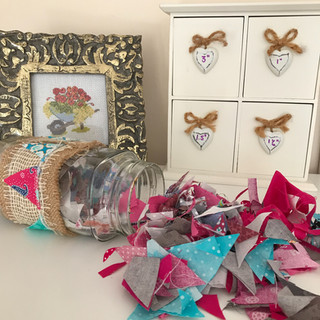
I am joining in with quite a few quilt alongs at the moment and have found my scrap jar filling up. Any off cuts get cut down into the biggest square possible and filed away for later but the off cuts from those go into my scrap jar. I have used a lot of pinks recently so the heart seemed the obvious choice but this technique works with any shapes. You could do the first letter from a name for example.

There is an example of one of the cushions I made years ago using this technique in the gallery below. It is one of my little boys favourites so it looks well loved but I think the little fraying around the edges adds to the charm and texture.
The finished cushion is 16" or 42cm squared and took a couple of hours to make.


YOU WILL NEED
Bondaweb half metre
Jar of scraps
Solid coloured cotton (I used my calico/cream)
Giant ric rac 2.5m
Sewing machine
Iron and ironing board
Scissors or rotary cutter
Pins
Safety pins (optional)
METHOD
1. Cut your cushion panel to size. I have made mine around 45cm. I usually make my cushion covers the same size as the filler so I will use a 45cm square filler for this cushion. I used the solid cream cotton which is the colour of calico but softer and doesn't crease as much as the traditional calico. To make a perfect square I fold the fabric diagonally and then cut as shown in the picture.

2. Fold your Bondaweb, rough sides together so you can draw a half heart shape in pencil on the paper side. Cut it out while folded so it is symmetrical. I have just done this free hand but mine is about 30cm tall and 32cm wide. Also notice I have not used my fabric scissors for this!

3. Fold your panel in half and half again and push a crease in to work out where the centre is.

Place your heart in the centre, rough side down. Iron on using a dry iron (follow the instructions for whichever Bondaweb brand you have used). Wait for it to cool for 10-15 seconds before you peel it off. It is easier when cool and it does get really hot so you don't want any burns. You will have a shiny glue heart shape. Keep the paper because you will use this in a minute.

4. I emptied my jar onto a small cutting mat on my ironing board so I could see what I had to work with. I sorted out all the pinks and a few greys and blues to break it up a bit. Some were triangles, some were selvages or long skinny pieces. Everything goes. You will occasionally need to cut them down a bit more to fit.
5. Place your pieces next to each other a cluster at a time. They will overlap slightly but try to avoid this too much. When you have a few, place the backing paper back over it and iron on top of those pieces, no steam. Try to avoid going over the Bondaweb that hasn't got fabric on yet as there is a chance a small amount may transfer back onto the paper and then end up on your fabric.

Keep going until your heart is full.


6. The Bondaweb will mostly keep your fabric in place but it won't be very durable if you leave it like this so you will need to sew all over it to hold them in place.
Pin your heart to some wadding. I will let you into a secret. When I make quilts for myself I usually try and use up end bits of wadding. If I don't have quite enough I will use scraps by placing them next to each other and ironing an off cut of interfacing along the joint. It can't be seen through the cushion and uses up all those little left overs from my keepsake quilts.


7. I have used a fuchsia pink thread and my free motion foot to do some random quilting all over the heart. Ensure you capture the edges and corners and that all of your pieces are sewn over. This is why I don't stick to much of a pattern. Alternatively, if you don't have a free motion foot, start on the edge and follow the outline in a spiral until you get to the middle.


8. Now for the ric rac trim. Although this step isn't necessary I think it really finishes the cushion off. I haven't pinned it, just placed the ric rac slightly overlapping the edge and sewn close to the edge to baste it into place, curve it around the corners. When you get to the end curve the end off the edge so no raw edges will show.


9. I have done an envelope back. Cut two pieces the same width and 2/3rds the height of the cushions. Press over one of the long edges on each piece, twice, and straight stitch to hem. Place right sides together with the top one first, flip over so the heart is facing you and pin into place.


10. Sew around the edges with a half inch seam allowance. I always turn mine out to the right way before I trim to make sure I have captured all the fabric and ric rac. If all is well, trim the edges and corners and finish off your exposed seams with a zig zag stitch or over locker.
Thank you for reading, I would love to hear from you if you give the tutorial a go. For more free tutorials, new fabric arrivals and SALE updates, make sure you have subscribed to my mailing list.


Comments