
Pencil Doorstop Tutorial
- Katie Done
- May 8, 2019
- 4 min read
Updated: Jun 18, 2023
I was asked if I could make a couple of doorstops for a school that my friend works at. I thought for ages about what I could make and the only school themed things I could think of were apples. It was around the time I knew Stuart Hillards Rainbow Etchings fabrics were due out by The Craft Cotton Company and so I thought up the idea of making a stack of pencils. I am really pleased with how it turned out, perfect for a school, play room or kids bedroom. I have written up a free tutorial on how to make your own.


YOU WILL NEED
Rainbow Etchings 16 Fat Quarters
Fat quarter cream or calico cotton
Sewing machine
Stuffing (I used scraps of clothing)
Rotary cutter and mat
Quilting ruler
Iron and ironing board
Ribbon
1 m Heavy Weight interfacing
Iron on interlining (optional)
Bag of sand or pebbles (optional)
METHOD
1 - Cut fabric - Start by making your top panel, the un-sharpened end of the pencils. The unfinished size of each colour is 2.5". Use a 1/4" seam allowance throughout. Cut the following:
1 1/8" square - 1 in each colour
3/4" x 2 1/2" - 2 in each colour
3/4" x 2 1/8" - 2 in each colour
1 1/8" x 7/8" - 32 cream
7/8" x 2" - 32 cream

2 - Sew your pencil patch together - Sew your smaller cream and coloured square together first.

Press your seams open. Until very recently I had always used my iron. Its amazing how this simple seam press can make such a difference to your sewing. I no longer have to get up and down to iron in-between each stage. I feel much better about reducing the amount of electricity I am using through ironing everything.

Sew the longer cream pieces to surround your coloured square.

In the same way, now add the coordinating coloured edges.
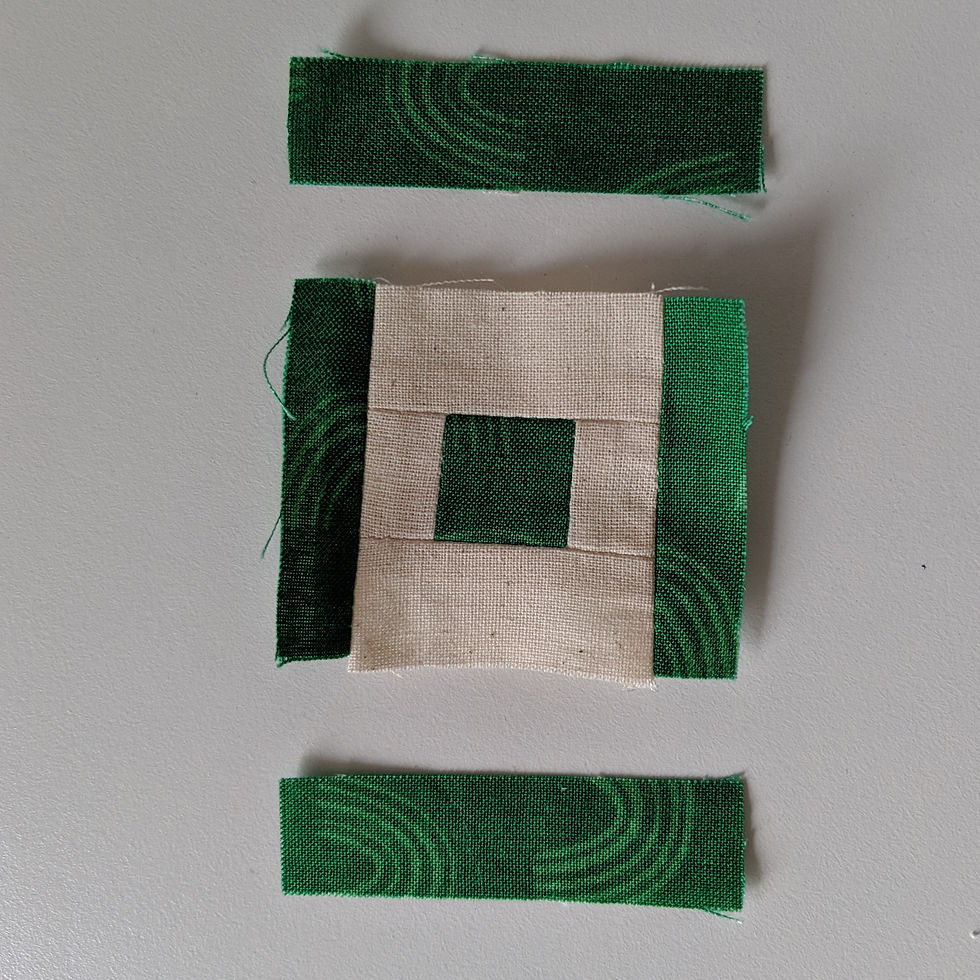
Your square should mow measure 2.5", it may need trimming. Repeat for all 16 colours.

I have pressed all my seams open, here is picture of the back.

The order you arrange yours in is up to you. It took me ages to decide on this. If you do a different variation, be sure to adjust the cutting of your fabric when it comes to the pencils in the next step.

3 - Sew pencil ends together - When you have decided on the layout, sew your squares together in pairs and then in 4 patch squares.

Then sew those 4 together to create the top of your doorstop. How good does it look?! It should measure 8.5" square.

4 - Now make your pencil sides - cut your fabric as follows:
1 3/4" square - 32 in black
1 1/2" x 2 1/2" - 16 in cream
1 1/2" x 2 1/2" - 2 green, 1 yellow, 1 orange, 2 red, 1 light pink, 1 dark pink, 2 lilac, 1 indigo, 1 purple, 2 light blue, 1 dark blue, 1 lime green
2 1/2" x 10" - 2 green, 1 yellow, 1 orange, 2 red, 1 light pink, 1 dark pink, 2 lilac, 1 indigo, 1 purple, 2 light blue, 1 dark blue, 1 lime green
5 - Join all your smaller coloured and cream fabric on the long edge and press seams open.


6 - With right sides together place a small black square on one of the coloured corners and sew from one corner diagonally.

7 - Trim the excess. Open up and press the seam.

8 - Repeat on the other side.


Now repeat with all your other colours.
8 - Make pencils - Sew the pencil tip to the coordinating long strips. You should have 16.

9 - Sew them in batches of 4 that match the edges of the top panel.


9 - Apply interfacing - Cut interfacing the same size as all your panels and apply it to the back of all 5 panels. I have used iron on interlining on the base only (because I only had enough left to do this), it still worked using the regular interfacing but you may get a more sturdy shape with the interlining on all sides.
10 - Start constructing your doorstop - Sew opposite sides first, it doesn't matter which ones. I have used the ribbon the fat quarters came tied in and cut it in half to use as a handle. Back stitch over the ribbon when you sew to ensure it is secure.

11 - Create the box shape - now pin the other two sides on. Start from the centre, matching your seams and at the corners turn and go up the long edge.

It should look like this. Now repeat on the other side.

You may need to snip the corners before you turn it out.
12 -Now for the base - Cut a piece of fabric and interlining 8.5" square. I have used the grey rainbow etchings fabric. Apply the interlining to the wrong side of the fabric.
Pin the base onto the doorstop, matching up the corners. Sew around all edges but leave a gap for stuffing. Trim your corners.

13 - Stuff - I have been collecting my quilt trimmings and other small scraps to fill this. You could buy stuffing but it is quite big when finished so I needed quite a lot. I make keepsake quilts and recycle the left overs which are shredded and used for stuffing. It made sense to use some of these to fill it (as well as a few pairs of socks that had holes in, cleaned of course). The other bonus of using left over clothing rather than stuffing is the weight, its much heavier. The door this was intended for was quite heavy and it wasn't quite heavy enough with just the scraps.
If you need more weight, add a bag of sand or pebbles to the bottom. I reused a bag I received a delivery in and an elastic band left by the postman so secure it.

14 - Finish - Slip stitch the opening to finish.
Ta da! this will brighten up any door way. I would love to hear from you if you give it a go. For more free tutorials, special offers and new fabric arrivals, make sure you sign up to my mailing list.


Comments