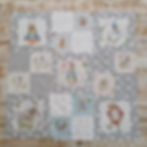
Peter Rabbit Baby Quilt
- Katie Done
- Mar 5, 2020
- 3 min read
Updated: Sep 18, 2024
After covering a child's chair with the centre part of the new Peter Rabbit panel, I had the rest of the panel to play with still. Along with the other fabrics in the range and the new nursery basics in grey from The Craft Cotton Company, I got planning.
There were 6 characters left but the reason I kept this one back for myself was that I accidently cut into Flopsy Bunny, so I have just used the remaining five to make a quilt which worked out perfectly anyway.
With just three weeks left until my new little dude arrives, I was feeling very motivated to get this finished and in his nursery! I managed to get it finished in a day with just a bit of hand sewing on the binding left to do.
The finished quilt is 90cm square. Use a 1/4" seam allowance throughout.

YOU WILL NEED
Nursery Basics Fat Quarters x5
Peter Rabbit Panel
Peter Rabbit Fat Quarters x 4
1.5 Metre of Fabric (backing and border)
4m of Binding (I used plain grey to make my own)
Quilting Ruler
Rotary Cutter
Cutting Mat
Sewing Machine
Iron and Ironing Board
METHOD
1. Cut your fabrics as follows:
From the panel cut the five designs to 6.5"
From the grey kites cut x10 2" strips
From the four remaining nursery basics cut x2, 5" squares
From the four Peter Rabbit fabrics, fussy cut 2, 5" squares from each design
From the white character fabric cut x2, 27.5" x 5" strips vertically (for the border)
From the white character fabric cut x2, 28" x 5" strips horizontally (for the border)
From 2 of the grey nursery fabrics cut x2 5" squares (4 in total for the corners)
This is how I have chosen to lay the fabrics out, but you can obviously move the characters around if you prefer.

2. Add the borders to the larger patches first. From one fat quarter there was just enough fabric to cut 2" strips. I have chosen the kite fabric from the collection because it is multidirectional, and it doesn't matter which way round it is sewn. To save cutting I have added them to the sides first. Press your seams open and trim.

The leftovers are wide enough to add to the top of the design. Press your seams open and trim. It should measure 9.5" at this point.

The back should look like this.

Repeat this with all 5 of your panel patches.
4. Now make your 4 patches. Sew your top pieces and bottom piece together. Press seams open.

Match up the seams and sew the top and bottoms together. I use a pin at the seams to ensure they are matched up. Press seams open.


The back will look like this.

5. Lay the finished patches out and make sure you are happy with the layout.

You now just have a giant 9 patch to sew together. I do rows first and then sew all the rows together.

6. At this point I decided to add a border to make the size up. I have used the fabric with the small print of all the characters this is why I have been specific about which ones are vertical and horizontal, it will ensure all your characters are facing the same way. For the corners I have used two of the grey nursery fabrics.
Sew the side pieces on first.
Sew the grey 5" squares to the short ends of the remaining border pieces with the designs in opposite corners. Press and sew the horizontal borders to quilt. That is your quilt top done!

7. Quilting and finishing is always a personal preference. I was in the mood for some free motion quilting and I felt inspired by the tails of the kites so went with lots of swirls. If you are new to free motion quilting, I would give a few top tips:
Do a test piece first
Use your darning food to free motion quilt
Start in the centre of the quilt and work your way out
Always use good thread such as Guterman or Metler
Keep the stitching fast but your movements slow and consistent
Check your back stitches regularly

To bind I have machine sewed to the front and hand stitched to the back. Now I just need a baby to snuggle in it! Doesn't it look gorgeous on the chair I made too. The tutorial for the chair is here.

For more free tutorials, new fabric arrivals and special offers, make sure you subscribe to my mailing list. I would love to hear from you if you give the quilt a go so head over and share and tag your pictures on my social media pages.


